Kleopatra for Linux installation and operation guide
Kleopatra is a PGP tool for managing encryption keys. This guide describes how to create a public PGP key in Kleopatra on Tails and other Linux distributions.
Kleopatra on Tails #
The Kleopatra tool is installed by default in Tails version 5.0 and later, and manual installation of an UI application for GnuPG on this system is not required.
- Search for Kleopatra in the Applications menu and click to run.
- To preserve access to the generated and imported keys between sessions, set up an encrypted persistent volume. Select Applications→Tails→Persistent Storage, click Contrinue, enter a strong random password twice in both Passphrase and Confirm fields, and confirm the volume creation by clicking Create Persistent Storage. Select GnuPG in the list of persistent volume features and finish setup.
Installing Kleopatra via Flatpak #
For Linux systems, installation via Flatpak is the recommended method. It does not require verification of checksums and PGP signatures. For user application installation, Flatpak does not require elevated privileges, the following steps can be performed in a default user session.
-
The Flatpak tool is installed by default in many Linux distributions, including available in Whonix-Workstation 18. If the flatpak command is not available in the console, install Flatpak according to the instructions for your chosen distribution.
-
Add the Flathub repository, set the visibility of FLOSS applications (Free/Libre and Open Source Software), and install the org.kde.kleopatra package with the following commands:
|
|
Because all connections are anonymized in Whonix-Workstation, application installation may take longer, and the occasional [28] Timeout was reached error may require you to repeat the last command several times.
- The Kleopatra application requires a GnuPG agent process running in the background. In Whonix-Workstation 18, it is installed by default, so we skip this step.
Debian/Ubuntu and derivatives:
|
|
Fedora/RHEL/CentOS and derivatives:
|
|
Arch Linux and derivatives:
|
|
openSUSE:
|
|
- We configure the GnuPG agent autostart with the command:
|
|
Then, before the first launch of the Kleopatra application, we ensure that the GnuPG agent is running with the command:
|
|
- You can launch the Kleopatra application using the shortcut in the applications menu or with the command:
|
|
On Qubes OS, for an app qube created from the whonix-workstation-18 template (for example, the default anon-whonix), after installing the application, click Refresh applications in the Settings→Applications menu, wait for synchronization to complete, then check Kleopatra in the All available applications list, click > to move the application to the Applications shown in App Menu list, and confirm the changes by clicking OK. The application shortcut will be visible in the Qubes system menu for the selected app qube.
Generating keys in Kleopatra #
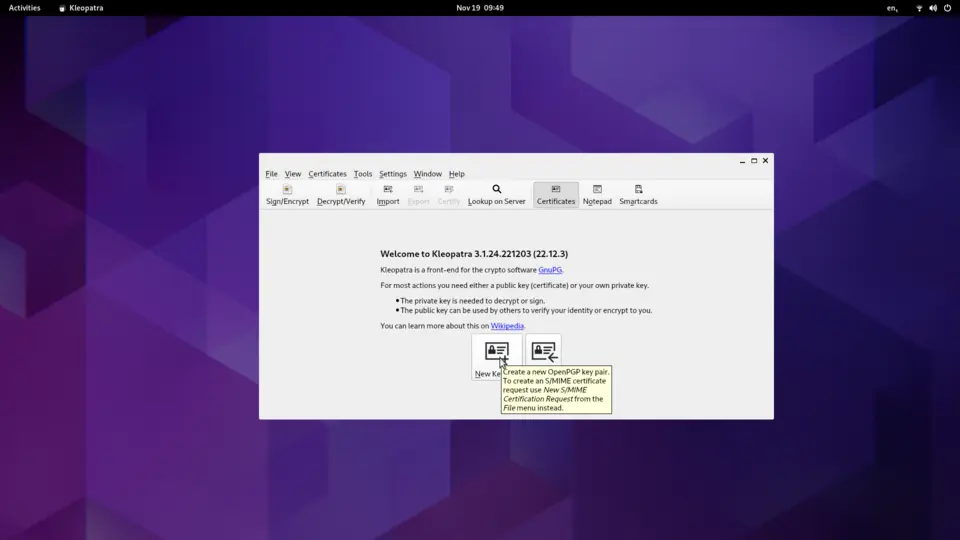
- Open the Kleopatra application and click the New Key Pair button.
- Enter your nickname. It is recommended to set a passphrase. Click Advanced Settings.
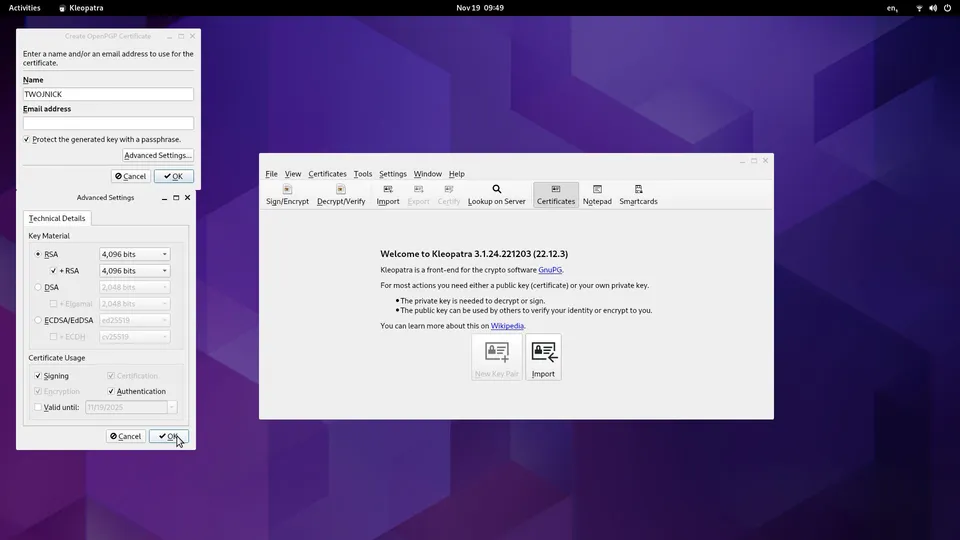
- Select your preferred key algorithm and size RSA, 4096 bits, check the Authentication option, and click OK.
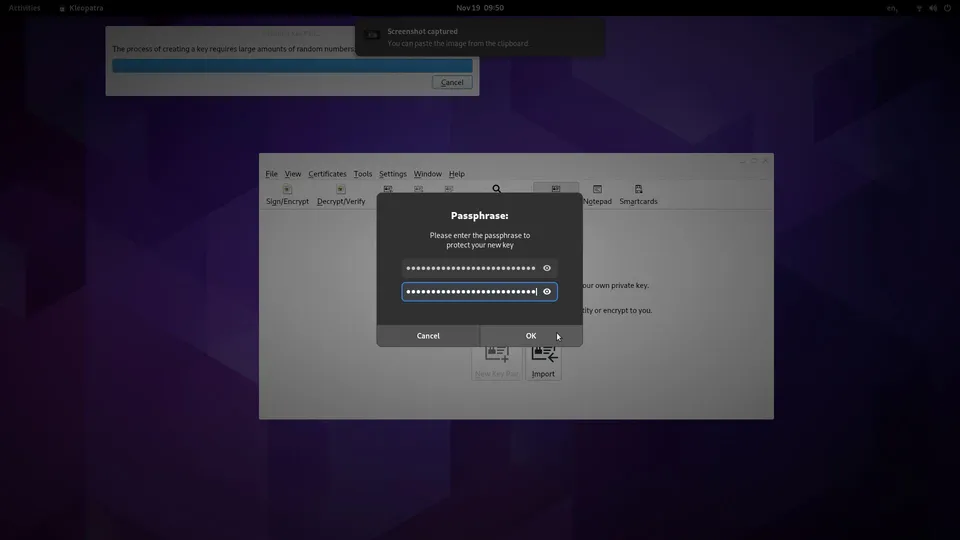
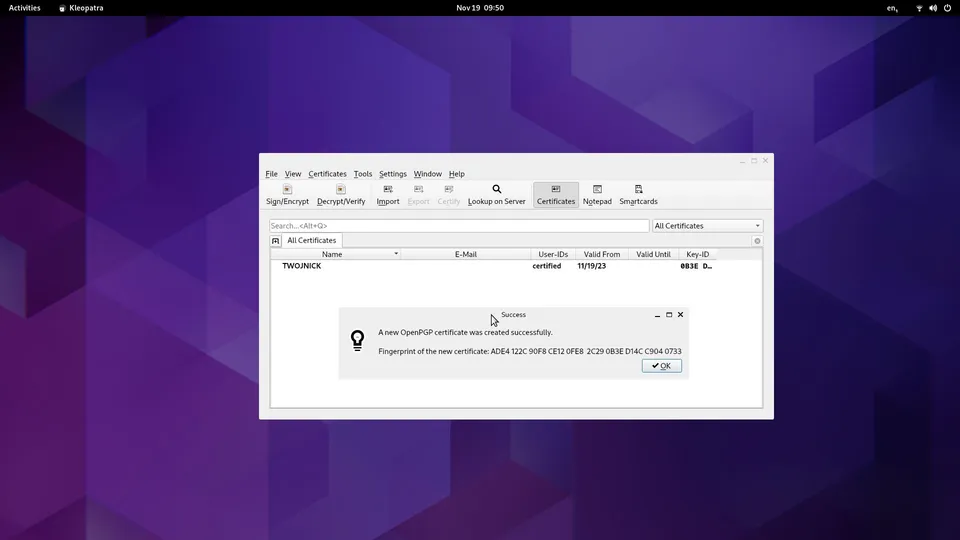
- Set a passphrase for the key, which will be used to protect it, and then click OK.
Backing up the private key in Kleopatra #
- Go to the key management screen, select your private key, and click Export Secret keys….
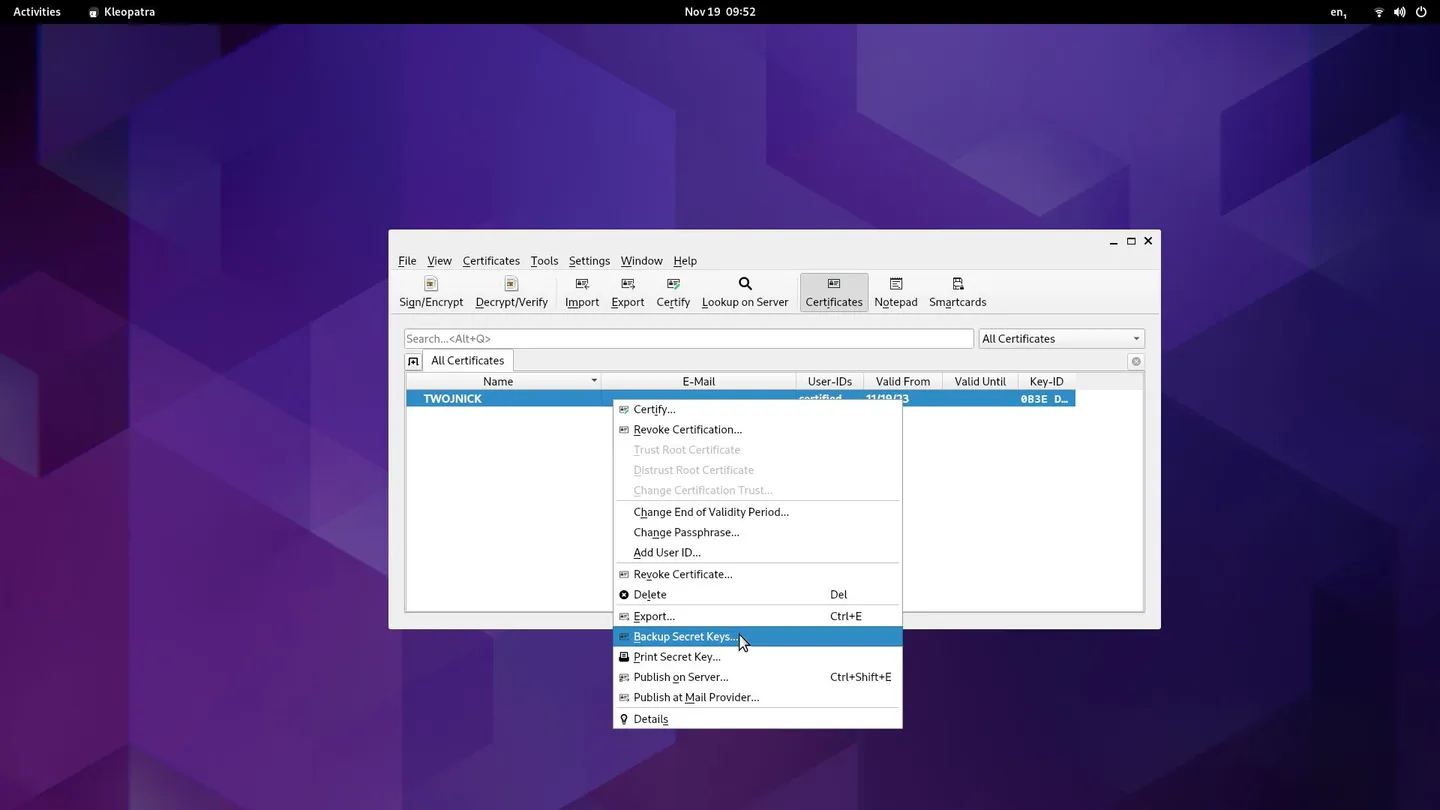
- Select the location where you want to save the key, and click Save.
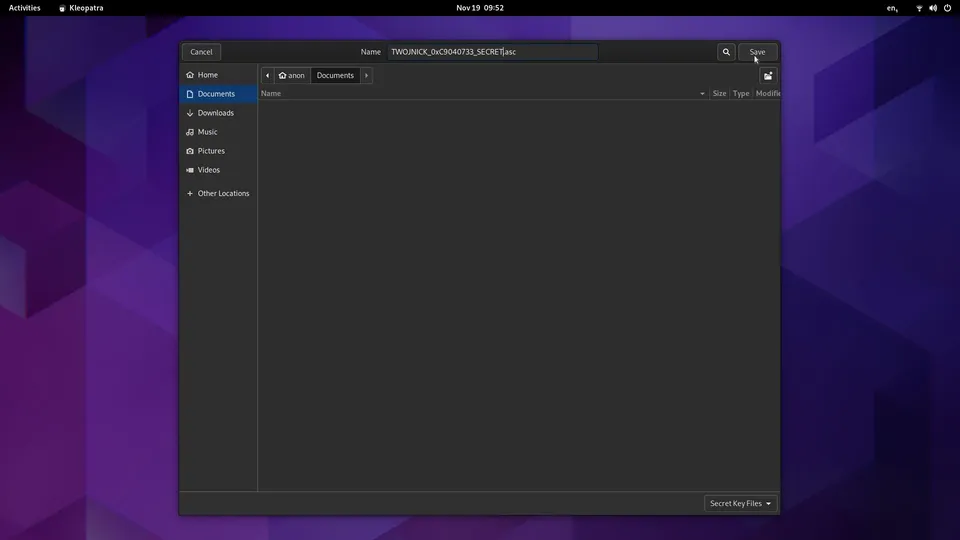
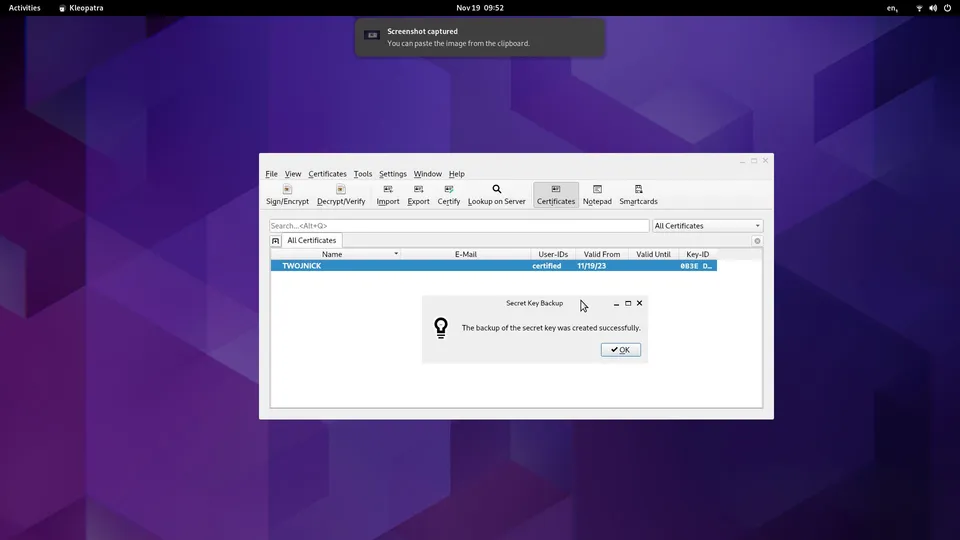
- Ensure the key is saved in a secure location.
- It is also recommended to create a backup of the public key.
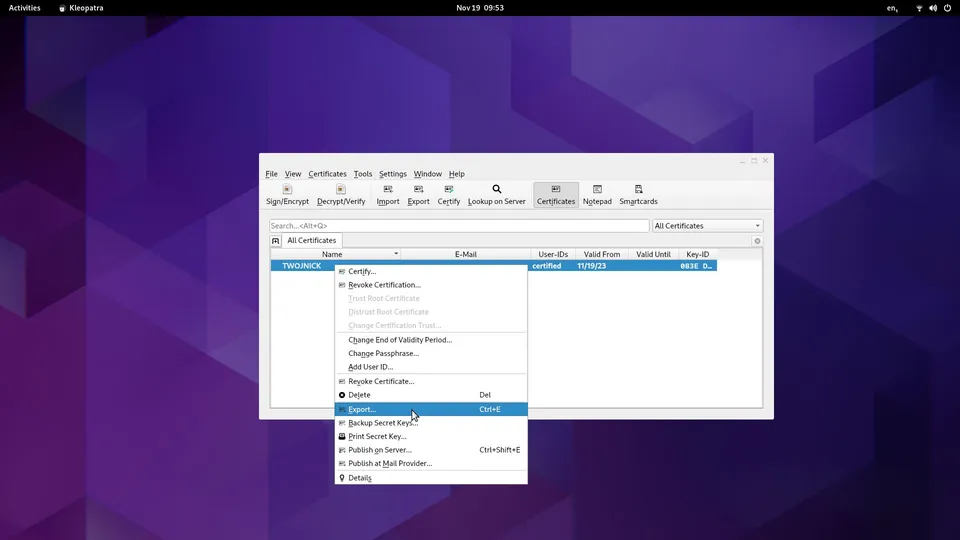
A backup copy of the private key should be encrypted with VeraCrypt or TrueCrypt and placed on external media for protection against data loss.
Importing public keys in Kleopatra #
- Open the email or other communication containing the public key.
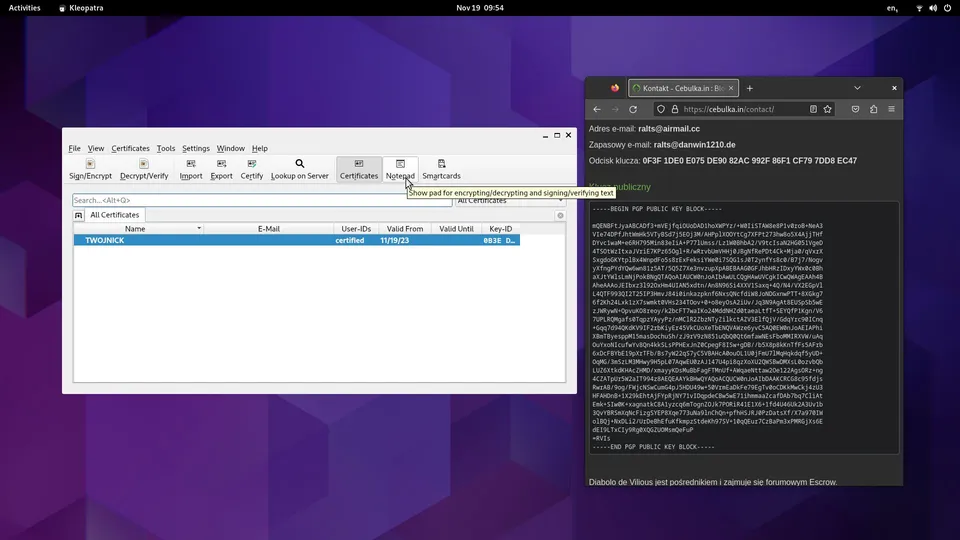
- Copy the public key to the clipboard.
- Open the Kleopatra application and select the Notepad option. Paste the public key and click Import Notepad.
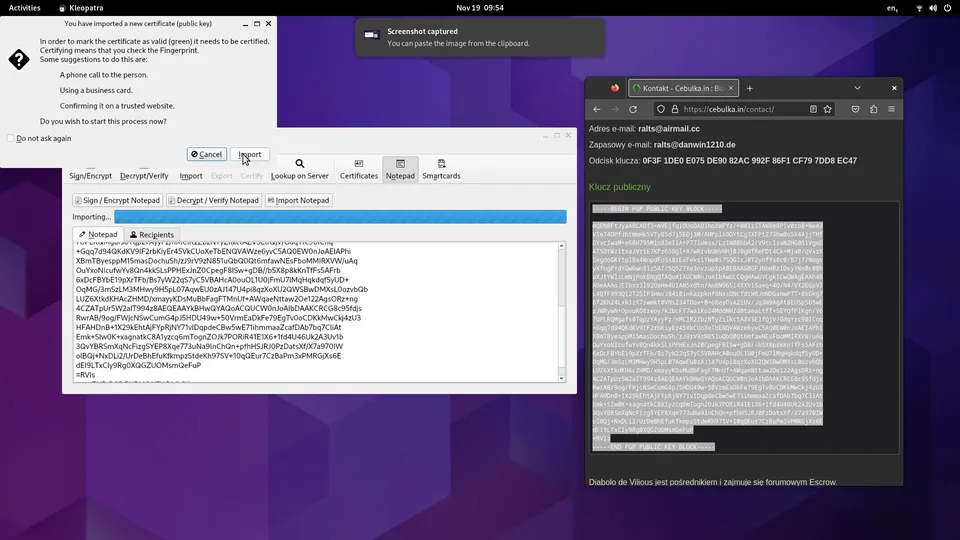
- You will then need to certify the new certificate. You will likely be prompted for a passphrase.
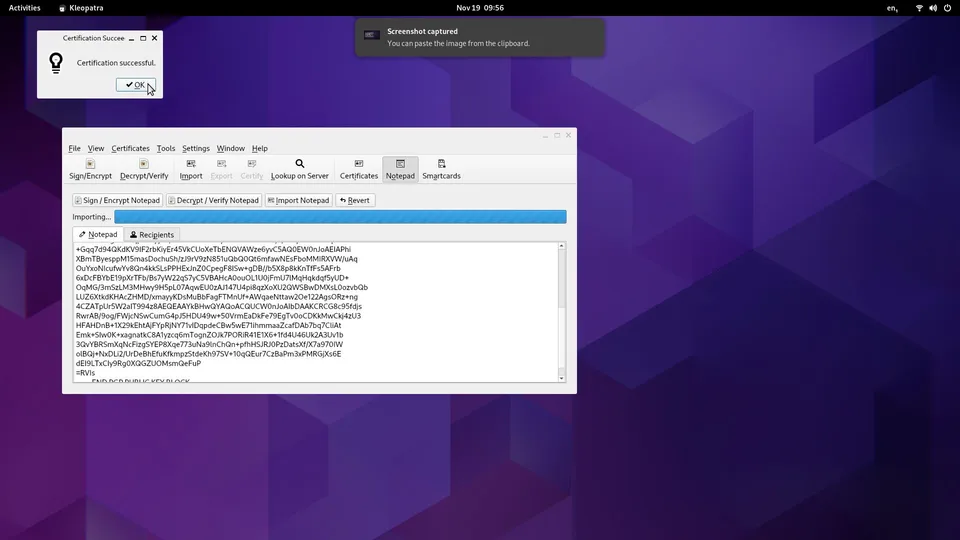
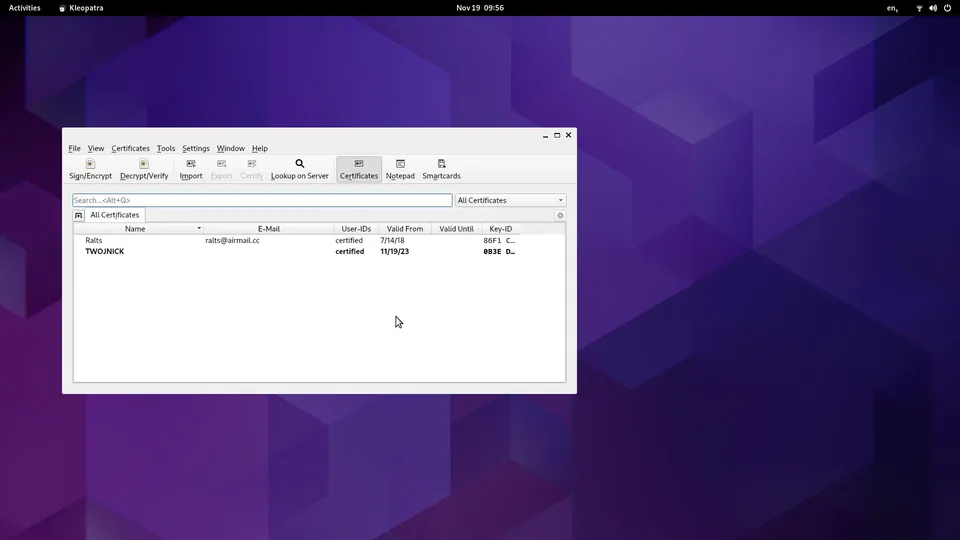
- Your new PGP key has been imported.
Encrypting messages in Kleopatra #
- Open the Kleopatra application and click Notepad.
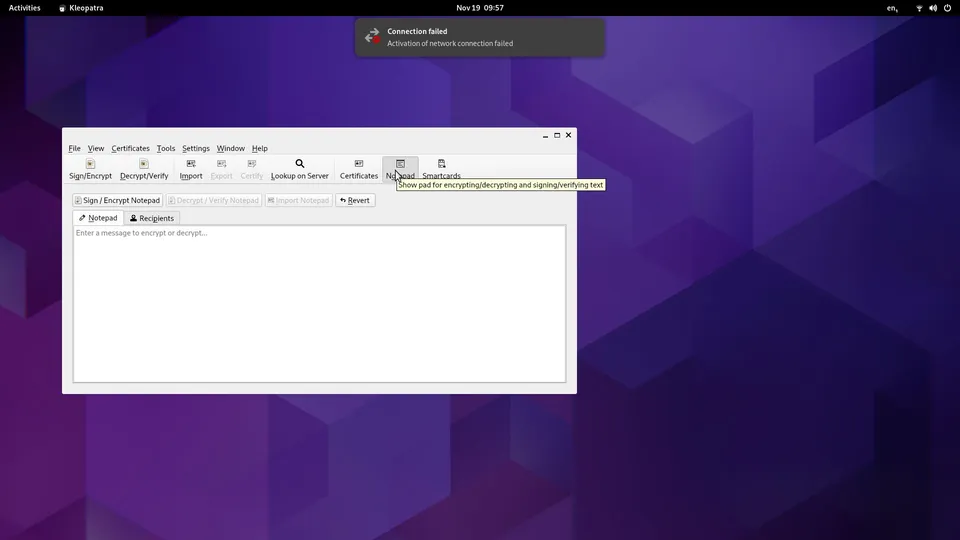
- Paste the content of the message you want to encrypt into the text field.
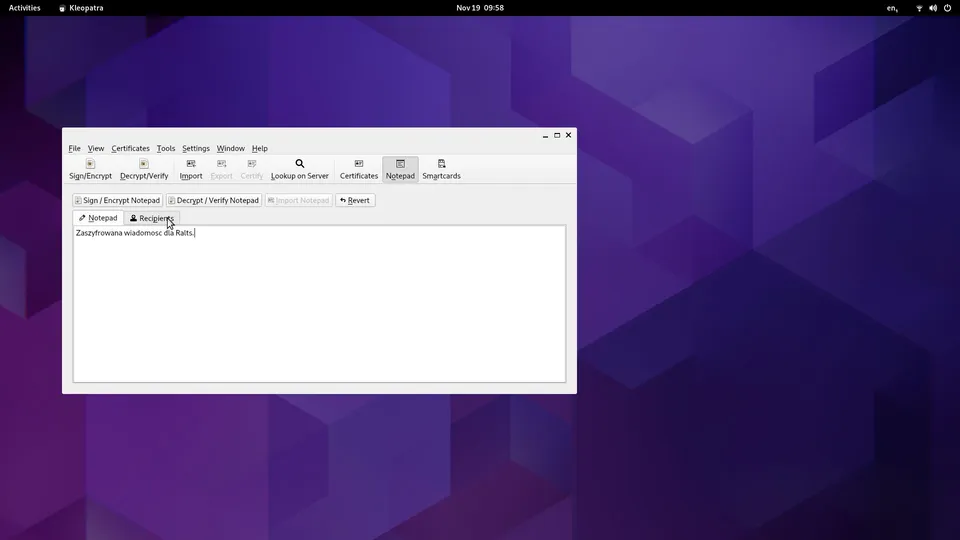
- Select the recipient’s public key from the list of available keys.
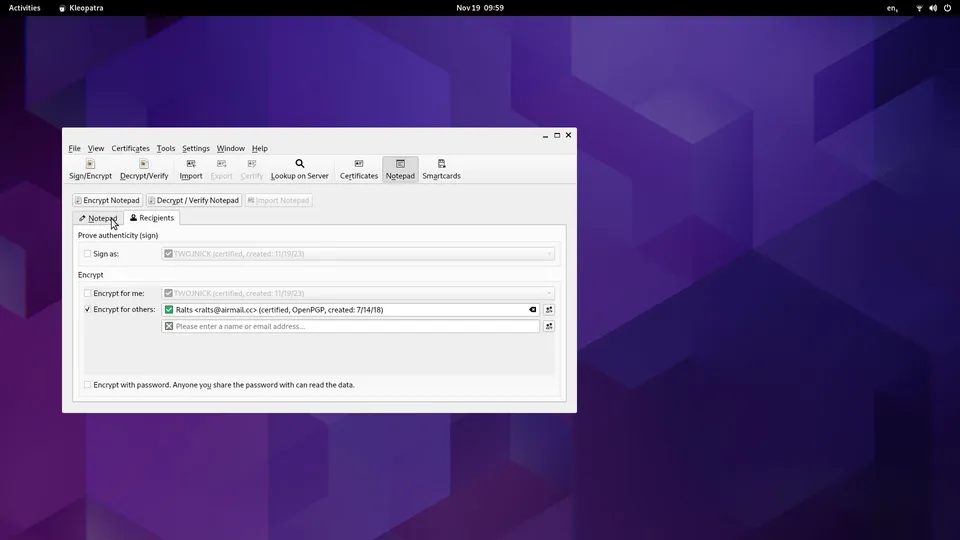
- Click Encrypt Notepad.
- After encrypting the message, copy the resulting text to the clipboard.
- You can now share the encrypted text in another app, such as via an instant messenger, or save it to a file.
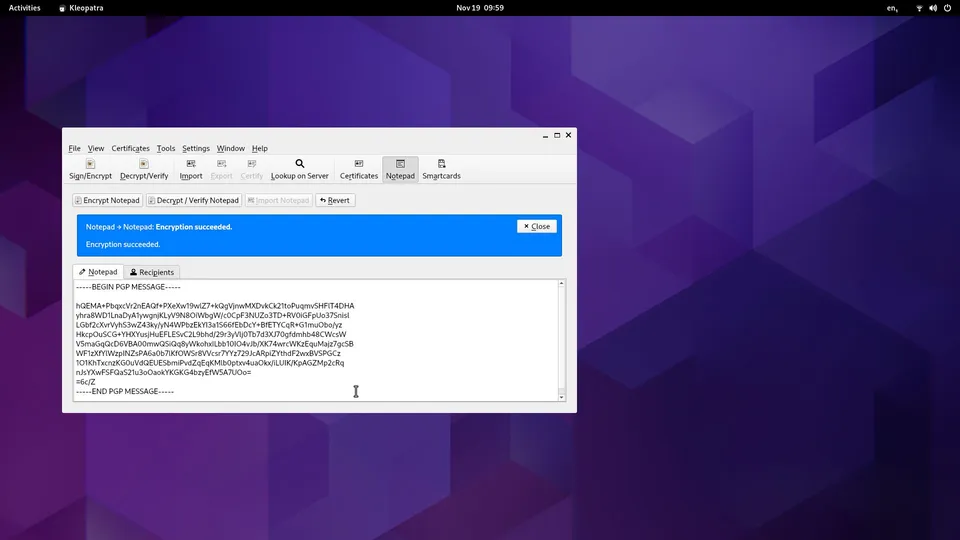
We do not need to import the public key again when encrypting the next messages. The key will be saved in the program files.
Decrypting messages in Kleopatra #
- Open the encrypted message in any text editor.
- Copy the encrypted text to the clipboard, then open the Kleopatra application.
- Click Notepad and paste the encrypted text.
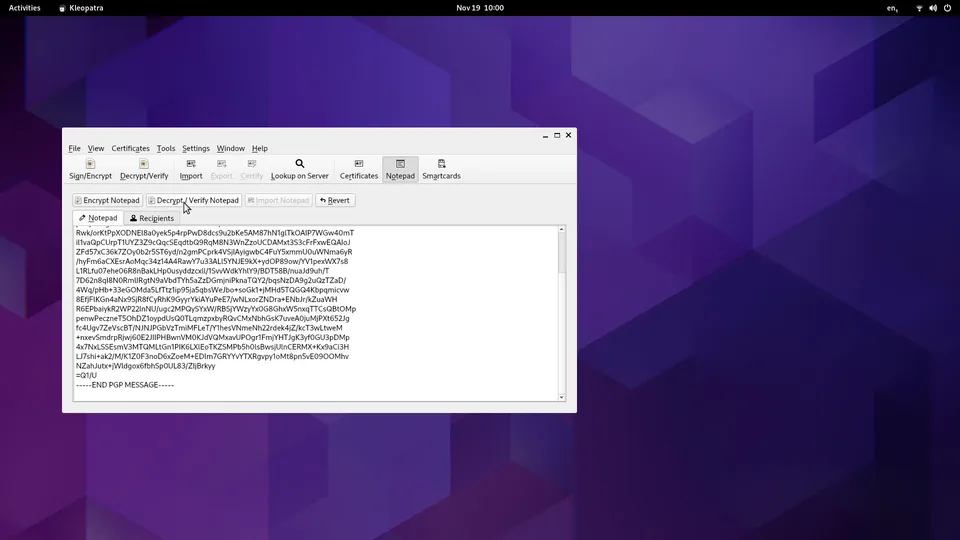
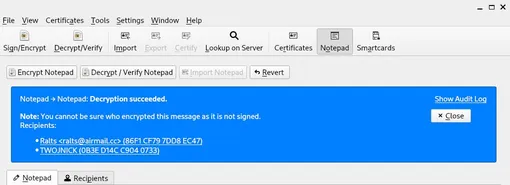
- Click Decrypt / Verify Notepad. If prompted for a passphrase, enter the passphrase for your private key.
Signing messages in Kleopatra #
- Open the Kleopatra application and click Notepad.
- Paste the content of the message you want to sign into the text field.
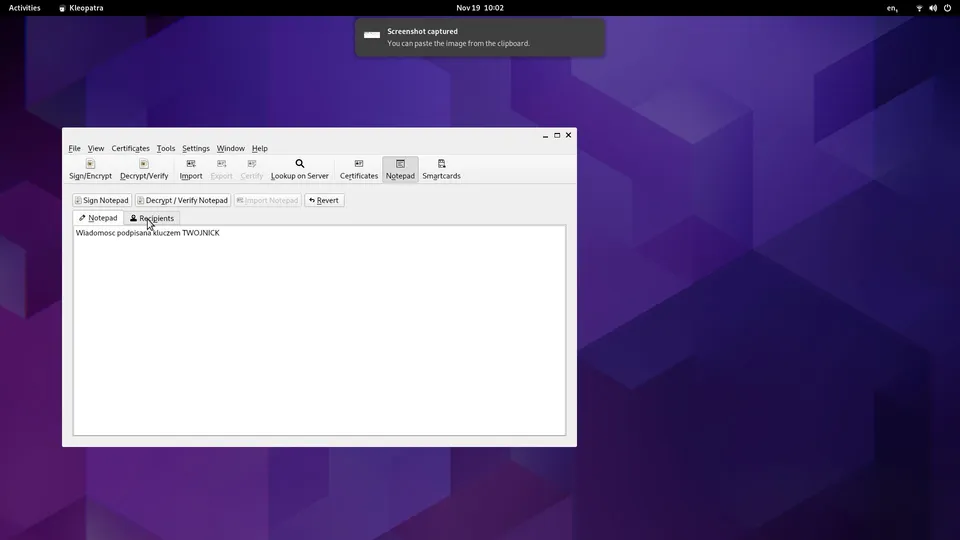
- Select your private key.
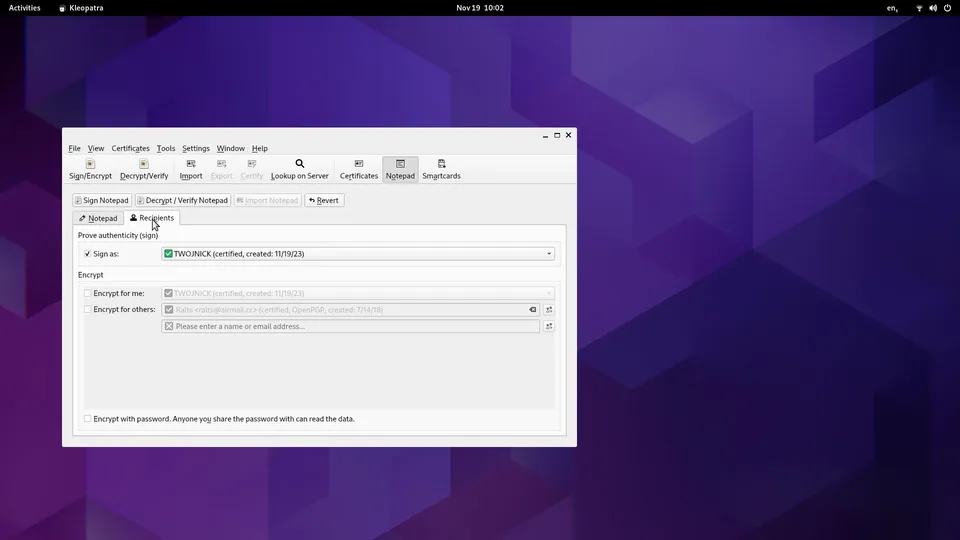
- Then click Sign Notepad. Copy the signed text to the clipboard.
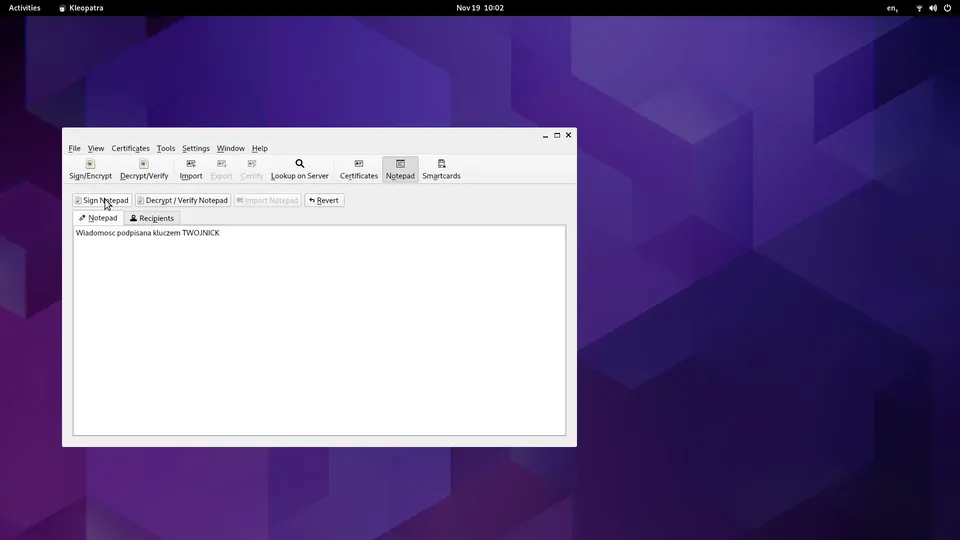
- You can now share the signed text in another app, such as via an instant messenger, or save it to a file.
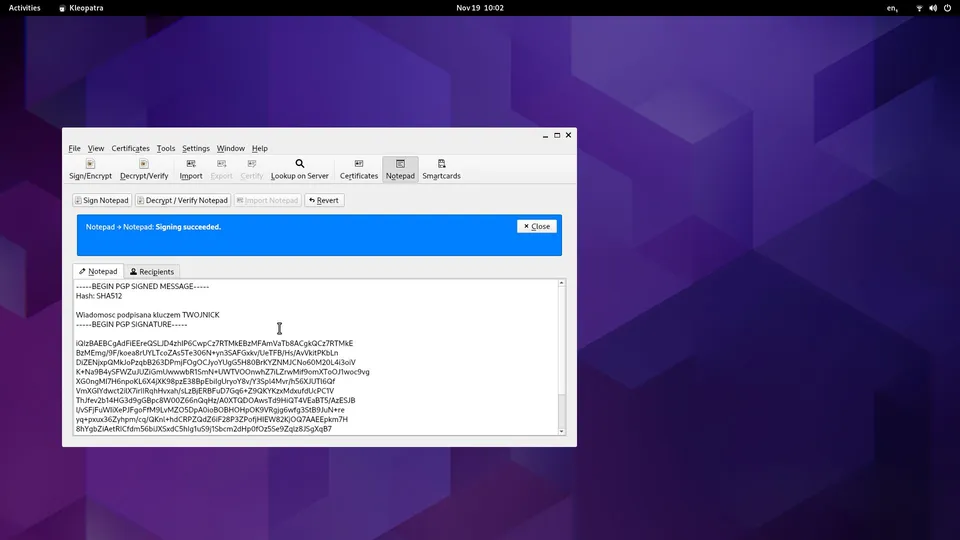
Avoid signing messages that seem universal. For example, a signed “I agree” or “It’s me” message can be saved and used to impersonate you in another conversation. Signed messages should be complete sentences describing the purpose and circumstances of the signature.
Verifying messages in Kleopatra #
- Open the signed message and copy its content to the clipboard.
- Open the Kleopatra application, click Notepad and paste the signed text into the text field.
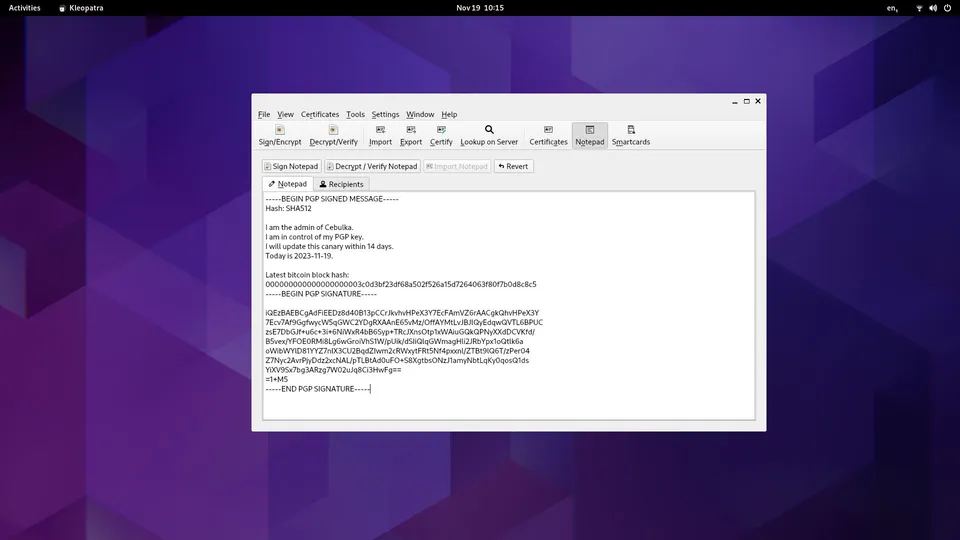
- Click Decrypt / Verify Notepad. Kleopatra will display the verification result, informing you whether the signature is valid.
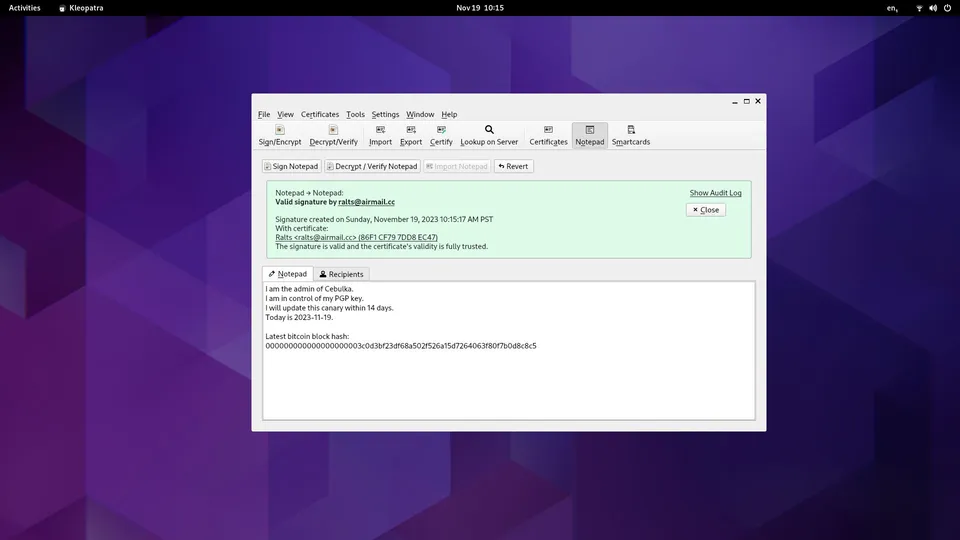
We do not need to import the public key again when verifying subsequent signatures of the same author. The key will be saved in the program files.